Three easy side dishes


If you are at all familiar with Korean cuisine, it’s traditionally made up of a bowl of rice and soup, accompanied by a bunch of side dishes like so.  Being a full-time victim of corporate America and still new at homemaking, my dinner table is more untraditional, or conventional in the world of every other newly-wedded young professionals like me – consisting of one entree, a starch, and a vegetable dish, and other times something of unknown origin the husband whips up.  Like so.

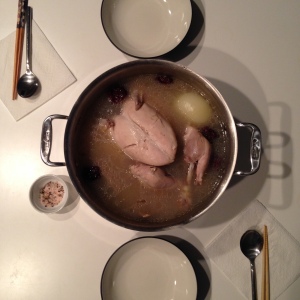
sam gye tang


My husband, unsurprisingly, prefers to be fed the traditional way, and sometimes I’m nice enough to sacrifice my day off to bulk make a few side dishes.  Yesterday was one of those days, and I opted to make three very simple yet tasty dishes.  Eggplant and spinach are in season, I think, so I like to believe that they taste better than in other months.  The fishballs are my new discovery, as I always always used Japanese fishcake, and these korean fishballs I found at the market last weekend happen to be tastier.  All sauces and seasonings are those that I always keep in my pantry.

Three simple dishes in three simple steps:

1. Wash and steam EGGPLANT –> cut/rip steamed eggplants into strips –> mix* with thinly sliced scallions, hot pepper (I also added julienned cucumber), soy sauce, fish sauce, and sesame oil to taste (sprinkle it with sesame seeds**)

2. Wash SPINACH in cold water –> scald in boiling water with some pink salt (5 to 7 seconds) then submerge in cold water immediately (to prevent your spinaches from looking like dead weed) –> mix* with a pinch of salt, very little fish sauce, sesame oil just enough to give a shine, and sesame seeds**

3. Cut FISHBALLS into bite size –> EVOO and pan fry –> Add oyster sauce for sweet and salty flavor (optional hot pepper for a slight spiciness to your liking) and sprinkle sesame seeds**

*When any type of mixing that’s better done with hands than utensils is involved, disposable vinyl gloves (as you can spy in the picture) come in handy -> is an understatement

**I take it after my mom to finish off almost all dishes with sesame seeds.  It adds a hint of nutty flavor to what may otherwise be a little too fishy, bland, or strong.  In other words, I seem to believe that sesame seeds make everything taste better.

Spying-worthy pantry staples: sesame oil, Korean cooking salt (mat-so-geum), Viet Huong Fish Sauce, Korean cooking soy sauce (not pictured), sesame seeds

photo 2-3

I whipped up some yummy potato pancake like a pro, and it was a feast of our own kind.  Seriously satisfying.
 

The Best, literally, ultra moist Chocolate Cake

As it seemingly happens quite often with any Instagram user, I’ve randomly (okay, and a little amusement with Sydney) learned of a supposedly amazing bakery called Zumbo Patisserie in Australia.  With my late cravings for chocolatey sweets, I searched for a cake recipe imitating that of Zumbo’s, and what I found was an actual recipe Zumbo had presented to Taste.com.au.  It may not be an exact recipe he uses in his bakeries, who knows?, but hey, it turned out to be pretty darn amazing.  My husband reiterated that it has to be the “best chocolate cake he’s had.”  Some words that have described this cake (between my husband and I..): fluffy, not too sweet, amazing, soooo good, light, soooo moist, the best.

Because the measurements were given in grams, which we do not use readily here in the States, I did further research and managed to convert them into units we are more familiar with.  I’ve also made some modifications to the amount of some ingredients, if it happened so that the mix didn’t look right (which probably is because of the conversions).  My version is just a plain chocolate cake, without any frosting.  So here it goes~~~**””

Ingredients:

2 eggs, 1 1/3 cups flour, 1/2 tsp salt, 3 1/4 tbsp cocoa powder, 1/2 tsp baking powder, 1 tsp baking soda

1 1/3 cups white sugar, 1 stick of butter (at room temperature)

200ml hot water, 0.6 cup whipping cream (may substitute with yogurt or sour cream)

Preheat oven to 330-350 degrees Fahrenheit depending on the type of your oven.                                                                                     (I baked at 330, then increased it to 350 after 20 minutes)

Batter:

  1. Mix eggs together
  2. Sieve flour, salt, cocoa powder, baking powder baking soda together
  3. Mix butter and sugar and make it crumbly
  4. Add the eggs to 3, little by little
  5. Add whipping cream and mix
  6. Sprinkle in the sieved dry ingredients and keep mixing
  7. Finally, add the hot water.  Keep mixing, and your batter should be pourable

Bake in oven for 25-30 minutes until you poke the middle with a wooden stick, and it comes out clean.

Image

Credits: http://www.taste.com.au/news+features/articles/1838/how+to+bake+a+cake+like+adriano+zumbo

Jjam Bbong

My continued effort to create dinner without shopping for more grocery bore homemade jjam bbong. Honestly, I would have never thought that I would be making this noodle soup at home because this is what you eat at Chinese restaurants – with jja jang myun, and pork tang soo yook.  Surprisingly, it’s really easy to make, and I surprised myself once again with what I can make out of just staples around the kitchen.
Ingredients: (serves 2 adults with normal sized stomach)

  • Soup: Chicken broth 500 ml, Water 500 ml (you can have them sit in the same bowl)
  • Veggies: 1/2 onion, 1/2 cup zucchini, 1 cup truffles (I used enoki because that’s what we had in the fridge), 1 cup cabbage (I washed some old kimchi instead), 1/4 cup carrots, 1 green onions
  • Seafood: assortment of squid, shrimp, mussels (I used a ready-to-use, prepackaged seafood assortment: available at Korean markets)    *Note: Too much seafood may end up creating bitter taste, so dig into your memory and picture what your jjambbong looked like at your favorite Chinese restaurant
  • Msc: salt, sugar, 2 tbsp chili powder, 1 tbsp minced garlic, cooking oil
  • Noodle (kalguksu is preferred but I used the udon noodle that was sitting in our freezer for quite some time)

Chop, Fry & Boil:

  1. Noodle should be cooked separately, drained, and ready.
  2. To prep the toppings, julienne zucchini, carrots and onion.  Cut cabbage and truffles into bite size.  Green onion should be cut into thin, long slices (approx. 3 inches long).
  3. Seafood should be thoroughly washed
  4. Using a wok, or a pan deep enough to hold all the liquid later on, saute the garlic and green onion. (If you decide to also use pork, this is when you would cook it)
  5. Add in the vegetable (except the truffles) and fry over high heat ***important***for no more than 10 seconds, then add 2 tbsp of chili pepper and fry until evenly coated.
  6. Add in the truffles and seafood (except the mussels) and fry just until seafood is not raw. This should be very quick. Do not overcook.
  7. Add in 1 cup of soup (chicken broth + water) and boil for 10 seconds. This brings out the flavor from fried goodies.
  8. Pour the rest of the soup in with mussels and let boil.
  9. When mussels are cooked, add salt and ground pepper to taste.  (Optional 1 tsp of sugar will make it taste more like restaurants version)
  10. Pour the soup over the ready noodle, and tada!

photo 5

dak dori tang (Korean spicy braised chicken)

Image


Lately, I have been trying to be a frugal and efficient homemaker by using up (almost) everything we have in the fridge before going for another round of grocery storming at Costco and Hmart.

It’s been a pretty successful challenge, and this chicken dish was another winner that I just whipped out in under one hour, like any skillful kitchen-lived Korean mother would (although I’m not a mom yet). My iPhone-quality picture may not seem too appetizing (as I had not anticipated posting of a recipe), but hopefully this recipe will help you create a more justifiable presentation.


Ingredients

  • 1 Chicken (I used 1 pack of organic drumsticks sold at Costco: 8 drumsticks)                                                        
  • 1-2 Potatoes (depending on how much chicken you use)                                                                                        
  • 1 Onion                                                                                                                                                                    
  • 1-2 Chili Pepper (Mix of green and red for visual enhancement, or just jalapeño pepper like I used)                      
  • 1 Green Onion

For the Sauce: 2 Tbsp Korean chili paste (go choo jang), 3 Tbsp Soy sauce, 1 Tbsp Mapo Tofu sauce (I substituted with Miso paste & chili paste), 2 Tbsp Minced garlic, 2 Tbsp sugar, 2 Tbsp cooking wine (or similar found in your kitchen)


Get it going

  1. Wash your chicken very thoroughly (or get organic like I did and trick yourself into thinking it’s already sort of clean).  *Hint: If you bathe it in milk for ~30 min (or as necessary), you can get rid of some of the poultry smell.  I submerged it in water for about 10 min to get the blood out, then remembered the milk trick and bathed it in almond milk for about 5 min (no patience), and also took the skin off (because my husband thinks the skin will shoot up his cholesterol through the roof).
  2. Place chicken in a pot with whole garlic and some pepper (optional: couple bay leaves), and let it cook. Chicken doesn’t have to be completely cooked, as you will cook it again with potatoes.
  3. In the meantime, cut up potatoes, onion, green onion and peppers. (Size is your preference, but usually potatoes sizing about 1.5×1.5″ look good.  Peppers can be sliced into 1/3-1/2″ slanted pieces, onion into the size of your thumb, and green pepper into long (about 1/3 the length), thin slices).
  4. Put chicken, potatoes and 1 cup of water in a saucepan (or wok) and let it cook.
  5. While chicken and potatoes are cooking, you can make the sauce. Just dump all ingredients in a bowl, and stir furiously.
  6. As #4 starts boiling and potatoes look cooked, put the sauce in.  You don’t have to use up all the sauce depending on how spicy or mild you want it. 
  7. When #6 starts boiling, add in the onion and pepper.
  8. Just before finishing, place the green onion strips on top and let the residual heat cook it (I put it in right after the sauce and overcooked it…as clearly shown in the picture).

You can also add corn syrup (available in several substitutable options at a Korean market) for a sweeter version.  Point to remember is, rather than following the recipe to its exact measurements, use a little more or less of this and that to make it fit for your taste (and whoever you’re serving).

This wasn’t the first time I made dak dori tang, but it used to take me much longer in the past.  Although I don’t cook all the time, I feel like I’m taking leap steps toward becoming like my mom in the time I do spend in the kitchen.  I’m thinking about making my version of KFC (Korean Fried Chicken) in a few days.  If all is successful, I shall post the recipe (with better pictures).


Green Tea Cake

When the task is to describe my life in a few words, one word I never forget to include is “in-bok.”  It means that my life has been blessed with good people.  

Meeting my husband was another testimony to God’s gifting me with people and relationships because He not only bound me in marriage with a man I can be my silliest with, but also presented me with his family who I can be myself with and feel loved by.  In celebration of my sister-in-law’s birthday, who is a great cook and a baker of darling things, I challenged myself to put a real dinner on the table for the two families, with none other than oh what would a Korean girl do without – a green tea cake.

Recipe was incorporated from justonecookbook.com

Ingredients:

  • 3 large egg yolks
  • 1/2 cup sugar
  • 50 ml vegetable oil
  • 50 ml water
  • 2/3 cup cake flour (Cake flour = cornstarch : flour in 1 : 7 ratio) 
  • 2 Tbsp matcha green tea powder
  • 1 tsp baking powder
  • 3 large egg whites

Image

1. Preheat oven to 350F

2. Whisk egg yolks.  Add approximately 1/3 of the sugar (rest will be used later with egg whites). Add oil and water, then whisk.

3. Sift cake flour, matcha, baking powder together.  Add in #2 in three separate times.  Whisk until evenly mixed with no lumps (Tip: a good cake batter is whipped for 2 minutes, according to a professional baker co-worker of mine)

4. In a clean(!), metal bowl(!), whip egg whites on medium speed until bubbles form.  Add half of the remaining sugar and continue whipping for about 30 seconds.  Add the other half of sugar and whip at high speed for about 3 minutes or until stiff peak forms.  (Note: this is done best with fresh eggs.  The older the eggs, the more labor your arm would have to endure, unless you’re fashionably equipped with a KitchenAid Artisan Mixer or alike.  I had a Cuisinart hand mixer, which obviously was not enough because after baking two sheets, my arms feel like post-tennis tournament)

photo 3

5. Start by gently folding 1/3 of #4 into #3.  I used a silicone spatula. Add in more of #4 to your liking.

6. Bake for 30 minutes or until toothpick comes out clean when inserted.

Image

This is a sad picture.  I’m not sure why I didn’t take a better finished product picture…but it was pretty yummy.  I used a round cake pan but cut the cake sheets into squares (because the outskirts turned out harder) and towered the two sheets, with raspberry jam in the middle.  

Easy done green tea cake.  Happy baking!

Tulum and Food

Our goal while in Tulum was to experience authentic Mexican cuisine.  Being a tourist hotspot, our cabana village offered a variety of food options from Italian to Mediterranean.  Our ideal authentic experience looked more like eating tacos in a shack where nobody speaks English, but we lost the courage to do so as we drove by such places.  Like typical tourists, we stuck to our restaurants in the hotel vicinity.  The few places we tried actually fell into “pretty good (with a nod)” to “wow this is excellent” range.  To start, Juanita Diabolo, the pizzeria inside our hotel, offered excellent pizza (while their breakfast was less than mediocre).  Sorry – no picture taken since the pizza was eaten while we were still in a cold war.

El Tabano was a place that was highly recommended by a blog I read, and we waited two nights to get in because the restaurant did not open until 7 and conflicted with our schedule.  Our waiter was a newly trained young man from Spain.  He explained that Tabano is a type of mosquito, and Tulum, being a habitat to many many mosquitoes, gave the restaurant its name.

Image

Image

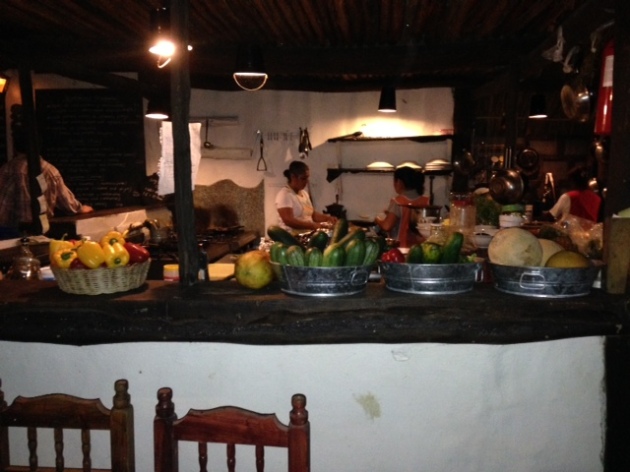
Menu is written with chalk on a wall, and the kitchen looks like this. It’s visible to everyone from dining tables and showcases fresh ingredients.

Image

Husband had fish tacos, and I had some kind of meat I can’t remember anymore.  We also shared a ceviche (my first time, and was excellente!), and a roasted tomato appetizer (more like a Spanish dish, recommended by the Spanish waiter of course).  Compared to the hype, we thought the food was alright.  It was definitely not disappointing, but I think we went in with too much expectation.  All in all, we had a great time.  This was our first real dinner in Tulum, and we were satisfied, and while the place made us feel like we were dining in a jungle, we got away with just two mosquito bites (thanks to December weather).

The second place I visited per blog recommendation was breakfast at Coqui Coqui, another hotel on the beach, but with rooms that cost the money we wouldn’t spend.  We initially planned on walking through the beach, but decided to be lazy and take the car, which was just as nice as the street was so picturesque.

Image

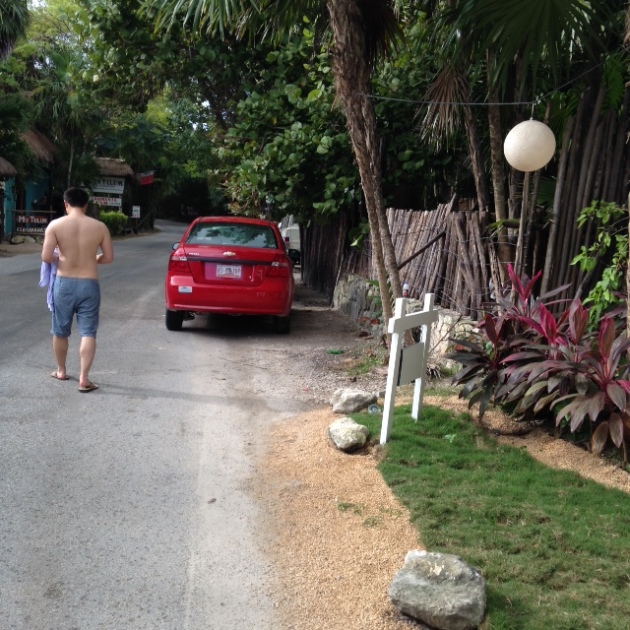
Husband shamelessly shirtless, pictured with our rental car, which served us from Cancun to Tulum, and everywhere else all the way to Chichenitza.

Image

It was a quiet morning at Coqui Coqui.  The restaurant was connected to the patio/beach area, and there were about four people soaking in the morning sun and sipping on whatever they were sipping on.  We ate inside because my husband cannot stay sane in the heat, and that morning was pretty hot from early on.  This place reminded me of Hemingway (don’t ask me why).  Decor included fisherman things like nets, shark tooth, and some wooden stuff I don’t remember anymore.

Image

Husband had something resembling a continental breakfast, and I had my soy latte (for which I emphasized SOY three times. Hey, don’t blame me for wanting to prevent any type of traveler’s diarrhea), and a more Mexican omelette which I forgot the name of.  Pretty good preparation.  The only downside was the dusty tables, but what can they do when the beach is right out the door.

Image

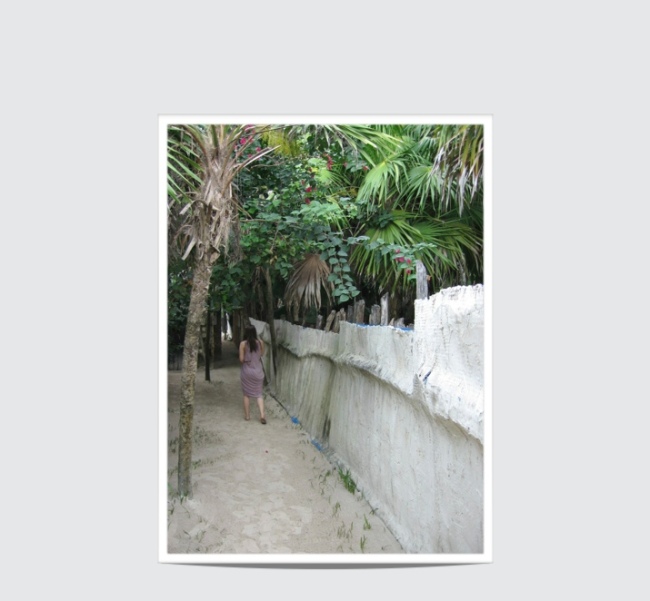
The entrance to this hotel/restaurant was on the beach side.  We had to walk through this alley-like pathway to get to our car on the street side.  Pictured is me trying to look like a refugee escaping from whatever through a jungle-turned-into-village.

Our best dining experience was definitely at Mateo’s.  A restaurant we actually discovered randomly.  Our hotel staff had recommended it, and we gave it a try without much thought, and oh man was it E-X-C-E-L-L-E-N-T!!!

Image

Image

For dinner, my husband had fish tacos again, which he claims to be the BEST fish tacos he’s had ever!  I must agree, it was pretty tasty with a hint of mango, juicy fish, and expertly toasted tortilla. I had their surf-and-turf, which came with BBQ ribs, grilled garlic shrimps, and salad.  If the food took any longer to come out, we would have stuffed ourselves with the chips (probably made in house, not greasy at all, and just kept going in and in and into our mouths) and salsa (two types, one being spicy, so flavorful).  Husband tried the cheapest beer on the menu, and I had an alcoholic coconut freeze drink, which hit the spot as I had dreamed, and we were sold.  Thank goodness Mateo also served breakfast with a full espresso bar – we were back for more excellency the following morning.

Image

Resembles a typical American breakfast, but I assure you, this was far better than many breakfasts I’ve had in our country. Mateo’s is also known for their fresh juices, so I got myself one of their tropical sounding juices to go, which came in a huge jug.

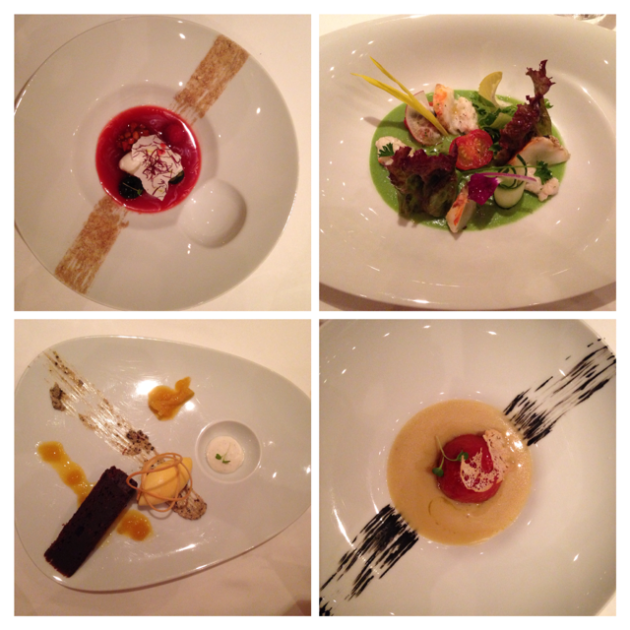
Our last dinner on Mexico ground was in Cancun, with our good friends Esther and Eugene.  They were kind enough to house us (in their resort hotel, a completely different experience from Tulum), and we treated ourselves to an eight course dinner at Gosh I can’t remember the name..

Image

Just a few pictures as my Photogrid only fits four.  All that beautiful, yummy creations, and my favorite was still the goat ice cream.  My friends and I had always fantasized about vacationing together as married couples.  This was our first one (sort of), and we had so much fun, although I ended up getting sick and played the party pooper 😦

Tulum – Mayan ruins and the village

We were glad we rented a car despite the hidden fees of ‘mandatory Mexico insurance.’  Our hotel was about ten minutes’ drive from downtown Tulum, and we got to experience the town a little without having to hitch hike like the brave European travelers we gave a ride to.

xImage


We quickly got used to the way Tulum drivers drove, but we surely felt lost when cars made left turns as they pleased with no signs of observable rules, or when the emergency light flickered every time a car would slow down.  

Downtown Tulum was not big.  Stores and restaurants lined the street and cars and people equally filled it up.  Everyone we came in contact with spoke English although my husband chose to practice his Spanish with them.  Although we didn’t find any restaurant we felt compelled  to try, we did get gelatos at a place owned by a Buddha worshipping Mexican lady.  


ImageImage


Most souvenirs were crafts and locally manufactured decorations.  My husband successfully brought down the price to what we would actually pay, but later found out that they were actually cheaper at the airport!  We scored a small black dog sculpture, which was found only at one store – it’s our most treasured souvenir.

Image


Image


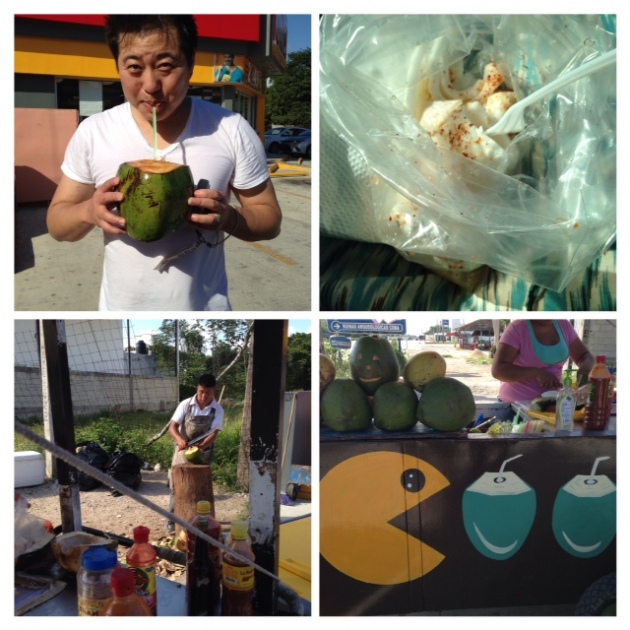
This coconut vendor was on the side of a two-lane road.  It caught my eyes every time we passed by, because there were always people buying coconuts!  After spending the whole morning exploring the town under the scorching sun, we decided to quench our thirst with these coconuts.  First we drank the coconut juice out of a straw, then they opened the coconut and cut up the flesh.  We ate it with some seasoning as was recommended by the owners, and it was something else!  Who would have thought we can eat coconut like that!


Image


We even went to a local supermarket to buy some breakfast and snack before driving to Chichen Itza.  It was just like Super Walmart – it had everything from toiletries to fresh produce, a bakery and a ready to eat food section.  


Image


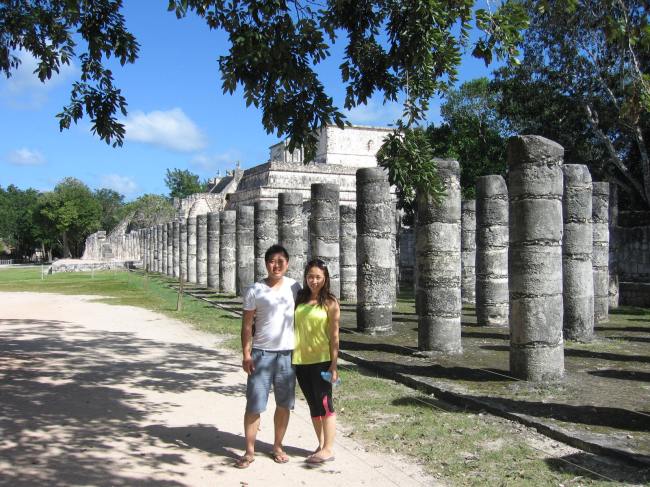
This is one of the Mayan ruin sites located just a mile from our hotel.  This place literally looked like Jurassic Park – but all we found were iguanas, some bigger than my forearm.


Image


Image


This is Chichen Itza, a world wonder.  That huge pyramid is not climbable anymore because some eighty-year-old man fell and died.  We had to drive direction-less on a very dusty country road for two plus hours to get here, and we’re not entirely sure if this wonder was worth that travel, but we would have regretted otherwise.


Image


Image


There was also what looked like a sports stadium, which reminded me of Quidditch field in Harry Potter – I presume the Mayans played with a decapitated head of a human sacrifice.


Image


It was deathly hot and I felt dizzy from the heat – hence the Horchata 🙂 to end our adventure.

Image

Tulum – Coco Tulum and the beach


Two flights with an hour layover in Atlanta, an unpleasant hour-long process at the car rental, and an hour and a half’s drive in a dark, dusty road with a couple detours later, we arrived at Coco Tulum, our home for the duration of our vacation.  The street with cabana hotels were so dark, we just drove blind until the familiar hotel sign I had seen on the internet came into our sight.  After parking our red economy size car in a parking lot surrounded by trees, we were escorted to our cabana for the first night.  


The entire hotel ground was sand.  We walked through exotic plants, carefully finding our steps in the dark, and after passing a few cabanas came to an open area, which the word ‘magical‘ is appropriate to describe.  The sky was midnight blue.  There were more stars than what I used to see in my grandmother’s front yard in countryside Korea.  The sound of the waves entered my ears and echoed through my heart, instantly relaxing my tired body.  Our cabana was the closest one to the water – just steps away from the common hammock area.  I quickly unpacked and tested out the hammock on our patio.  Like a bad habit, I picked up my phone, only to realize that I was without wi-fi.  I resorted to my ipad to perhaps do some reading, but soon found myself closing my eyes, feeling the ocean breeze gently touch my body, and letting the sound of the waves take over any thoughts that crossed my mind.  The night was indeed magical.

Image


I took this picture with my back against the water first thing in the morning before the sun got strong. The front cabana was our room for the first night.  On the second night, we moved to a more private, second floor unit.


Image


View from our second floor cabana, which we stayed in for four nights.  Patio was privately surrounded by plants.  Sunrise and sunset were equally as beautiful.  Lying on the hammock or on our princess-canopy bed as I call it (‘mosquito-netted’ according to my husband), perfect temperature with breeze, just enjoying each other’s company without the interruption of the iphone or the internet, we told each other “this really is heaven on earth.”

Image


As much as I love kids, one of the beauties of Coco Tulum (and surrounding cabana hotels) was that there were no kids.  There were no Asians and very few Americans.  Everyone was there strictly to relax and enjoy the untouched nature Tulum offered.  There were no obnoxious tourists or crazy party scenes.  Everyone respected everyone’s presence and privacy, keeping to themselves quietly, rising early and ending the day early.

Image


When I was researching hotels, my only concern was that Coco Tulum (like most cabana hotels) only had shared shower and bathroom.  There were four of shower stalls, bathroom stalls, and faucets each.  The hotel staff cleaned the entire site all day long and kept it squeaky clean.  It was never crowded, and we quickly found ourselves not minding the new lifestyle.  Soon enough, we started walking barefoot inside and outside our cabana, and lived in swimsuits and a light something we can throw on when necessary.  Wearing make-up or jeans seemed oddly out of place. One night, I put on a pair of relaxed-fit jeans to go to dinner, then took them off to get into an even more casual skirt after looking at myself in the mirror – jeans just didn’t seem Tulum.

Image


My favorite activity (although there weren’t many to choose from) was walking on the beach.  If my husband didn’t remind us how far we’ve come from our hotel or our stomachs didn’t call for another lazy meal, I would have walked endlessly.  The beach was a backyard to all the cabana hotels lining the coast.  The white sand was so clean it not only didn’t have any trash but didn’t have any shells or rocks either (to my disappointment).  The water would feel cold when you first dip your feet in it, but quickly get warm as your body temperature adjusts.  I loved the way the water entered the beach and moved the sand as it went out – it made the sand sparkle.


Image


Every morning, I would see some people jogging on the beach.  We didn’t dare attempt (haha).  Our leg muscles were somewhat sore just from the walks we took.  Isn’t that enough exercise?


Image


This is the most comfortable looking hammock shot I have.  To be completely honest, these hammocks weren’t all that comfortable – correction: it wasn’t all that easy to get comfortable on these hammocks.  I found a way to enjoy this nook of a net, but my husband never figured it out and chose the boring old beach chair.  We did enjoy laying in it together on our private patio – it balanced better and we started talking about light photons while swinging back and forth after sunset.


Image


Each morning I would walk past the patio and down the steps, onto the sand through the trees.  The morning air was so crisp and fresh, and I loved hearing exotic birds cry, with the ocean waves in the background.


Image

At the plastic surgeon’s

If you’re a girl of my age, the idea of getting things done to your face (or body) is not foreign.  You probably have a handful of friends who mysteriously came back with a transformed look after a summer break, who do not own or refuse to reveal pictures from the past , or who proudly boast a newly improved mask with no shame.  While I can’t help my eyes lingering on faces that have gone through sudden changes, I’m not completely against the idea.  Whether it’s a double eyelid surgery, a nose job, or nowadays popularly practiced botox procedure, I don’t think it’s much different from getting braces for your teeth.  But that’s not why I visited this plastic surgeon in a nearby suburb.

Sometime between college and grad school, I learned that I have a ‘wart-prone’ face.  The exact words my dermatologist then used were “wart likes your face.”  This was a very frustrating and stressful thing as 1. it was on my face, 2. it was on face, and 3, it was on my freakin face.  The cauliflower looking little bump would regrow on the same spot on my nose (sounds pretty nasty…sigh), and a cut I got from my glasses nose piece formed a scar at the bridge of my nose, which turned into what was identified as a flat wart.  This flat wart was not very visible.  As its name suggests, it is flat, and just looks like a raised skin with a slight discoloration.  Recently, I felt as though it was getting bigger, and thus reached out to my dermatologist, who then referred me to a plastic surgeon.  I was quite excited to go to the plastic surgeon for two reasons – I’ve never been to one, and the office (according to the website) was a state-of-the-art, ‘only one in the D.C. Metropolitan area to…’ this and that.  

The appointment day – Receptionists and nurses did not look like any receptionist or nurse I’ve seen at other doctor offices.  These people actually wore makeup and looked like they spent time getting dressed in the morning.  All chairs in the waiting room were occupied, and I couldn’t help but storywrite in my head what each person was there for.  I looked at the husband who came with the wife and wondered if he supported what she was getting done…or is he the one that suggested it?  She would rather spend money on whatever procedure she’s getting than on replacing that ugly old purse? And then I thought about what other people might think about me.  It’s so easy to judge and difficult not to judge.  But to my defense, I was just a curious newbie to the world of plastic surgery.

Just as you would see on an informercial or a magazine ed, I had to take one of those ‘before’ pictures.  Except, my flat wart was too subtle to show through a regular SDLR camera, so they used a fancy machine that scanned my whole face and analyzed it!  This machine compares your skin to 100 other women of your age, and rates it on texture, wrinkles, UV damage, brown spots, and color.  To my surprise, I rated well in the 90th percentile in all categories except UV damage, which got 58%.  The IPL specialist said that 58% still falls in the green zone.  I admitted to never using a sunscreen but that I probably got lucky enough to fall in the green zone because I grew up in Chicago – where winter is long and sunny days are less than generously presented.  

I laid on the procedure chair with metal goggles over my eyes, as two clinicians zapped at my wart, which was pre-medicated with a numbing cream, which was the key to my twitch (or scream)-free session.  My husband (the spectator), also with goggles, gawked at every zap and later told me maybe he should try an IPL treatment.  

I left the office with two conclusions – I should start using sunscreen religiously, and maybe my husband should consider IPL.  We (at least I) are so easily influenced by things told or put in front of us by this world.  The TV, articles, gossips, doctors, friends…  I believe it is the variety in opinions and expressions that make this world interesting.  The key to survival would be to stand your ground and decide for yourself, not by influence, what’s important to you.  

I don’t think my husband will need an IPL.  And my wart is not gone…maybe I’ll just live with it.

Image


Sample sunscreen I got from the office.  It’s light, scent-free, not oily, and didn’t make my skin break out.  The office sells it for about $30 a bottle, and I’m not aware of any other retailers carrying it.

It would have been fun to take pictures of the patients there, but I didn’t have the guts.

Foundation edit

ImageImageImageImage


I’ve been on a long trying search of the perfect foundation (or an alternative).  I have tried a handful of others that are not pictured, but this is currently what’s still occupying a space on my vanity.  I used to have an oily skin (in my younger days).  With years passing, I’m noticing that my skin is turning into more of a combination type, oily in my T-zone going into the afternoon-ish time but other areas dry (more severely in wintertime). I also have complexity issues as I find my skin not just yellow but spotty with some of my teenage acne scars still pigmenting the cheeks.  Thus, things I look for in a foundation are:

Medium coverage (enough to cover up imperfections while still making my face look as natural as possible)

Smooth application (some make my skin flaky when applied, and this is a no-no)

Moisturizing (it’s important that it doesn’t make my skin look oily after a few hours but be able to keep my face look moist)

Texture (silky enough to make me say ahhh when it glides over my skin)

Color (I prefer one shade lighter than my natural color, and pink tone over yellow tone)


 Clockwise

Photo one: from left to right 

1. Dr.Jart Premium BB with SPF 45 / favorite BB cream, applies smoothly, medium coverage, medium oiliness, medium lasting, doesn’t do anything extra (like making your skin glisten)

2.NARS pure radiant tinted moisturizer with SPF 30 / a little dry at first but becomes very oily with time, medium coverage, less than medium lasting, too yellow for my taste

3. Guerlain Lingerie De Peau invisible skin-fusion foundation with SPF 20 / second favorite foundation, applies smoothly, light yet offers medium coverage, moisturizing without oiliness, optimal lasting, makes skin look smooth overall 

4. Covergirl outlast stay fabulous foundation with SPF 20 / surprisingly satisfactory for the price, not as silky as Guerlain or EllisFaas, between med-full coverage, medium lasting, makes your skin flaky (not a good option for winter at all), I’ve stopped using it once I decided that it’s too dark for my post-summer skin

5. BareMinerals Matte Foundation with SPF 15 / you have to really control the amount of powder to avoid looking like your skin’s been caked on with foundation, full coverage, oily, but lasts long

* I use the sponge for even application (or my fingers when i’m in a rush) with liquid foundations, and brush with powder foundation


Photo Three: These are the newest (some repeating) additions to my skin regimen, which I’m very happy with. I have used 2,3,6 before, and they’ve won my heart over repeated trial-and-error. 

clockwise

1. P.D.T hydro gel mask / courtesy of mama Jang, supposedly the best pore tightening mask, I have yet to test these out

2. Shu Uemura Ultime 8 cleansing oil / best cleansing oil I’ve used, takes off makeup very well (including my bobbi brown gel eyeliner), smells great, washes off with water leaving skin feeling smooth

3. Aesop fabulous face oil (on my second bottle) / best face oil I’ve used, smells a little funky but you get used to it, keeps your skin moisturized all day without producing excess oil

4. Shu Uemura stage performer instant-glow cream / I discovered this cream while watching a make-up tutorial on Youtube.  The girl’s face instantly brightened, and still looked dewy with all the other make-up on top of it.  I’ve purchased it on impulse but am very happy with it. I use it under my foundation when I feel like I can use some glistening effect on my face

5. Ellis Faas Veil Foundation / okay, this foundation has got to be the best foundation out there (so far). I’ve read and read about it online, and it does live up to all the positive reviews and magical descriptions. I went overboard and got the fair/light (against a friend’s warning), but hey, it works and makes my skin great, and not too light at all!  This is my closest attempt in achieving a porcelain-like skin (very, very difficult given my skin color).  Bit pricey at $90 a bottle, but worth every working minute.

6. Atomi peel off mask and peeling gel / better than any scrub, exfoliator, peeling gel out there. I’ve used a ton of other products, and this is the only one that actually does what it’s supposed to do! Can be hard to find, but my mom was generous and lucky enough to find two, not just one, at a Korean grocery.  I think it’s privately marketed.  


Additional note: My other favorite, highly highly recommended is the Face architect illuminating moisture fluid foundation (breathe) by Shu Uemura.  Coverage is between light-medium but the color is gorgeous on Asian skin.  It’s silky smooth and smells great too.  I had found the perfect shade when I was in Paris, but it’s been hard to find in the States since then.  Might try it again after my Ellis Faas is done.

Additional additional note: Veil by Hourglass is a great mineral primer. Use it under foundation, and your skin is left with a literally velvety veil.  This product should be your foundation’s best friend.